Workspaces
Keep clients or teams apart — each workspace has its own contacts, email accounts, campaigns and MasterInbox.
A workspace keeps one body of work apart from another — for example, one per client. Each has its own contacts and lists, email and LinkedIn accounts, campaigns, MasterInbox, do-not-contact list, saved searches and exports, and its own people. Nothing in one shows in another.
When you sign up you get your first workspace, My workspace. You can add as many as you like — they're included in your plan.
Switch workspaces
Click the workspace's name in the top bar and pick another. You stay in the same part of the app: on Campaigns, you now see the other workspace's campaigns.
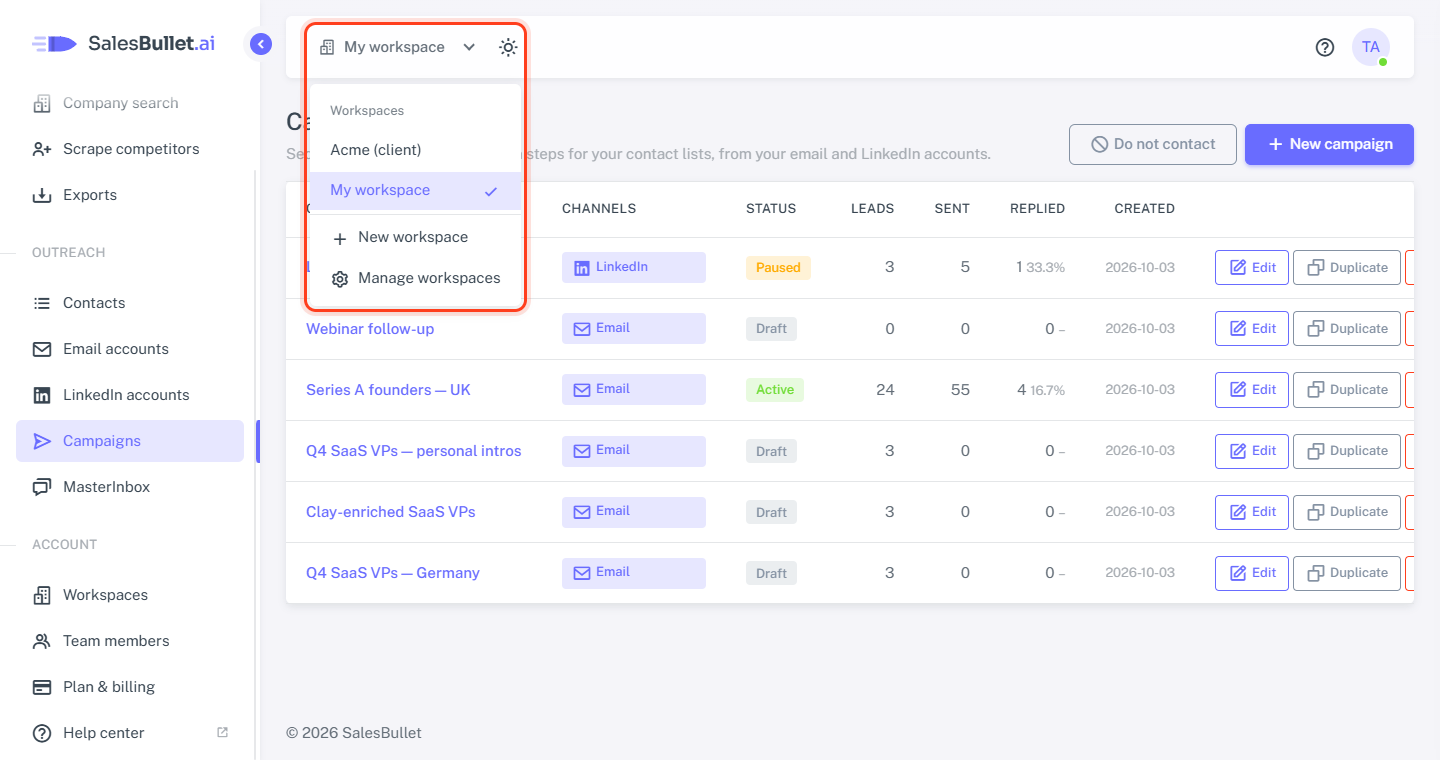
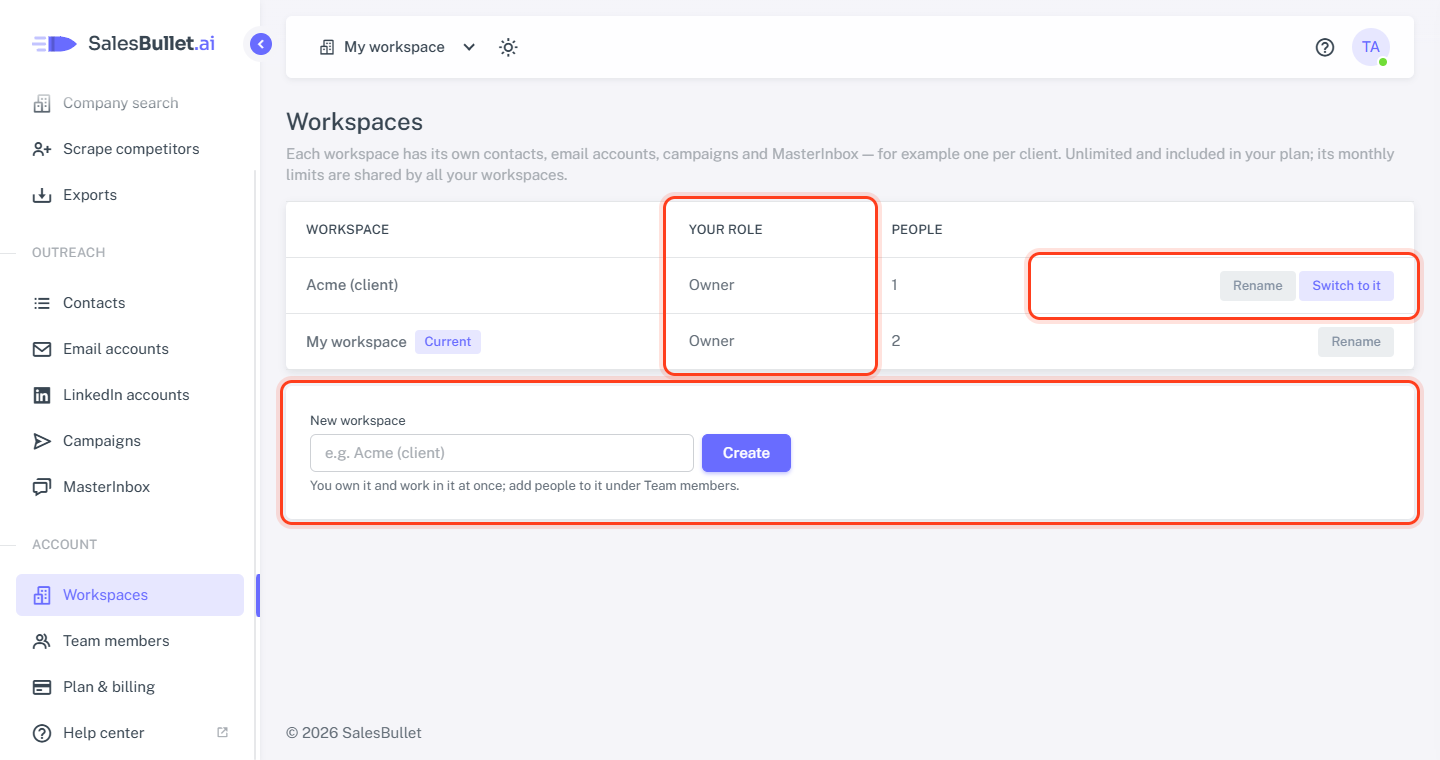
You can also click Switch to it on the Workspaces page.
Create a workspace
- Open Workspaces in the menu — or click New workspace in the switcher.
- Under New workspace, type a name, for example "Acme (client)", and click Create.
You own it and work in it at once. It starts empty: connect its email accounts, add its contacts and invite its people.
Rename a workspace
On Workspaces, click Rename next to it, change the name and click Save. Each of your workspaces needs a name of its own.
Owners and members
Your role says what you are in each workspace:
- Owner — it's yours. Only the owner renames it and adds or removes its people.
- Member — the owner added you. You work with everything in it: contacts, campaigns, the MasterInbox and the rest.
Credits belong to the owner's account, so all the workspaces they own share them — and work done in a workspace uses its owner's credits.